- Pioneer PDP-S21-LR
- С этим товаром часто смотрят
- Пользователи также смотрят
- Похожие товары
- Описание Pioneer PDP-S21-LR
- Характеристики Pioneer PDP-S21-LR
- Гарантия на — колонки Pioneer PDP-S21-LR для компьютера
- Pioneer PDP-S21-LR Service Manual
- 5 pages Service Manual for Pioneer PDP-S21-LR Speaker System
- Pioneer PDP-S21-LR Specifications:
- Pioneer PDP-S21-LR Document Transcription:
- Pioneer PDP-S21-LR Manuals
- 1 User Guides and Instruction Manuals found for Pioneer PDP-S21-LR
- Pioneer PDP-S21-LR Service Manual (5 pages)
- Document Information:
- Pages Preview:
- Pioneer PDP-S21-LR Compatible Manuals:
- Pioneer PDP-S31-LR Service manual
- Pioneer HPM-100 Service manual
- Pioneer KRP-S03 Operating instructions manual
- Speaker System Devices:
- Pioneer PDP-S21-LR Related Documentation:
- Popular Speaker System Manuals:
- DEVANT DV-5160 Operation & user’s manual
- JVC MX-GA9V Service manual
- Tannoy Arena HighLine 300 Brochure & specs
- Aiwa SC-A48 Service manual
- Pioneer PDP-S13-LR User Manual
Pioneer PDP-S21-LR
Товары со скидкой
С этим товаром часто смотрят

Пользователи также смотрят
Похожие товары


Описание Pioneer PDP-S21-LR
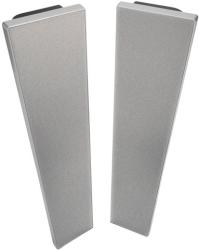
PDP-S21-LR предлагает отличное решение для тех, кто ищет фантастический комплект акустики, не полагаясь на сабвуфер. Этот комплект включает в себя две высоких колонки.
Характеристики Pioneer PDP-S21-LR
Гарантия на — колонки Pioneer PDP-S21-LR для компьютера
Гарантия на товар — 6 месяцев. В течение этого срока вы можете обратиться в наш магазин по любым вопросам гарантийного обслуживания.
Продажа колонок Pioneer PDP-S21-LR в наших магазинах возможна только по предварительному заказу.
В данный момент отзывы о товаре отсутствуют. Вы можете стать первым .
В данный момент вопросы о товаре отсутствуют. Вы можете стать первым .
Доставка и оплата Pioneer PDP-S21-LR
- Астрахань
- Барнаул
- Брянск
- Владивосток
- Волгоград
- Воронеж
- Екатеринбург
- Иваново
- Ижевск
- Иркутск
- Казань
- Калининград
- Кемерово
- Киров
- Краснодар
- Красноярск
- Курск
- Липецк
- Магнитогорск
- Махачкала
- Москва
- Набережные Челны
- Нижний Новгород
- Новокузнецк
- Новосибирск
- Омск
- Оренбург
- Пенза
- Пермь
- Ростов-на-Дону
- Рязань
- Самара
- Санкт-Петербург
- Саратов
- Тольятти
- Томск
- Тула
- Тюмень
- Улан-Удэ
- Ульяновск
- Уфа
- Хабаровск
- Чебоксары
- Челябинск
- Ярославль
- Винница
- Днепропетровск
- Донецк
- Житомир
- Запорожье
- Киев
- Кривой Рог
- Луганск
- Львов
- Макеевка
- Мариуполь
- Николаев
- Одесса
- Полтава
- Севастополь
- Симферополь
- Харьков
- Херсон
- Черкассы
- Чернигов
- Актобе
- Алматы
- Астана
- Караганда
- Костанай
- Павлодар
- Тараз
- Уральск
- Усть-Каменогорск
- Шымкент
Вы можете купить компьютерные колонки — Pioneer PDP-S21-LR в нашем интернет-магазине, заказав доставку курьером на удобное для вас время.
| Выбрать еще товары | Подробные условия |
Колонки для компьютера Pioneer PDP-S21-LR доставим по Москве и всей России. Отправка акустической системы — Pioneer PDP-S21-LR без предоплаты.
Источник
Pioneer PDP-S21-LR Service Manual
5 pages Service Manual for Pioneer PDP-S21-LR Speaker System
Pioneer PDP-S21-LR Specifications:
- Pioneer
- Speaker System
- Service Manual, PDF
- 5
Download PDP-S21-LR Manual (5 pages)


Pioneer PDP-S21-LR Document Transcription:
Pioneer PDP-S21-LR ORDER NO. PIONEER CORPORATION 4-1, Meguro 1-chome, Meguro-ku, Tokyo 153-8654, Japan PIONEER ELECTRONICS (USA) INC. P.O. Box 1760, Long Beach, CA 90801-1760, U.S.A. PIONEER EUROPE NV Haven 1087, Keetberglaan 1, 9120 Melsele, Belgium PIONEER ELECTRONICS ASIACENTRE PTE. LTD. 253 Alexandra Road, #04-01, Singapore 159936 PIONEER CORPORATION 2004 RRV3010 T-ZZ…
Pioneer PDP-S21-LR 2 1 23 4 1234 C D F A B E PDP-S21-LR Mark No. Description Part No. Baffle (R) ASSY SMX1098 NSP Baffle (R) SNK2799 NSP Punching Sheet (R) SNN1033 Baffle (L) ASSY SMX1099 NSP Baffle (L) SNK2798 NSP Punching Sheet (L) SNN1032 NSP Cabinet (L) SNK2801 NSP Cabinet (R) SNK2802 Network ASSY SWN1737 Input Terminal KKX1015 NSP Model Lab…
Pioneer PDP-S21-LR 3 1 234 1 2 3 4 C D F A B E PDP-S21-LR Mark No. Description Part No. Foam Pad SHA2448 Foam Pad SHA2449 Foam Pad SHA2450 Protector SHB1150 Packing Case (XIN/E Type) SHG2571 Packing Case (XIN/CN Type) SHG2614 NSP Packing Bag S2 SHL1407 NSP Label Serial SRW1087 (XIN/E Type) NSP Installation Manual Set SME3555 NSP Polyethylene Bag…
Pioneer PDP-S21-LR 4 1 23 4 1234 C D F A B E PDP-S21-LR PACKING PART NAME NUM. PACKING CASE 1 1 1 4 5 2 6 7 3 8 9 PROTECTOR CLEAR TAPE 12mm 1ACCESSORIES SET PART NO. REMARKS SEREAL BARCORD LABEL 2 SHA2448 SRW1087 DANPRON-TAPE CLEARNESS 50mm 11 10 ACCESSORIES SET 1 1ACCESSORIES SET 1 SHG2571 SME3525 SME3506 SME3507 150cm 12cm 1PROTECTOR SHA2450 SPEAKER SYSTEM L,R 1set 2PA…
Pioneer PDP-S21-LR 5 1 234 1 2 3 4 C D F A B E PDP-S21-LR LEAD WIRE (FOR WF) BLUE WHITE TW WF WHITE LEAD WIRE (FOR TW) RED RED BLACK LEAD WIRE (FOR INPUT) SMX10981 (1) 2 SNK2801 1SWN1737 NETWORK ASS’Y 3 4 KKX1015 1 MODEL LABEL(R) 1 INPUT TERMINAL SBN10566 INSERT NUT M5 7 SEB1244 SEB1255 SEB1256 SEB1262 SEB1273 SEB1290 SMT1240SEC1724 SED1121 1SEB1250 920 21 22 24 23 25 26 …
Источник
Pioneer PDP-S21-LR Manuals
1 User Guides and Instruction Manuals found for Pioneer PDP-S21-LR
Pioneer PDP-S21-LR Service Manual (5 pages)
Document Information:
- Pioneer
- Pioneer PDP-S21-LR / #980643
- Speaker System
- Service Manual
- pioneer/pdp-s21-lr_980643.pdf
- 24 Oct 2021
- 5
Pages Preview:
Pioneer PDP-S21-LR Compatible Manuals:

Pioneer PDP-S31-LR Service manual
PDP-S31-LR, 01 May 2021 (#5DR2Q7)

Pioneer HPM-100 Service manual
HPM-100, 14 Mar 2021 (#17CQ76)

Pioneer KRP-S03 Operating instructions manual
KRP-S03, 02 Apr 2021 (#F978LW)
Speaker System Devices:
Pioneer PDP-S21-LR Related Documentation:

Bose Speakers Manual (#XNX52M)
901 Series IV, 20, bose/901-series-iv.pdf

Speakers SBX-N700 Easy setup manual, #4555VN
SBX-N700, 2, pioneer/sbx-n700.pdf

Operation & user’s manual (Vector VRC-210, #T82774)
Vector VRC-210, 29, hh-electronics/vector-vrc-210.pdf

RS621 Speaker System — #2C7M5M
RS621, 2, dayton/rs621.pdf

Quick start manual (HTL2160, #VMG717)
HTL2160, 14, philips/htl2160.pdf

Speakers Quick start manual #T35NGR
HTL2163B, 16, philips/htl2163b.pdf
Popular Speaker System Manuals:
DEVANT DV-5160 Operation & user’s manual
All symbols and logo belong to the respective brand holder or registered holder. All specifications and information are subject to changes without further notice. Slight variations and differences might appear between the printed photos and actual product due to product enhancement.www.devant.com.ph80-FC360/5.1-97-1612 .
JVC MX-GA9V Service manual
SERVICE MANUALCOPYRIGHT © 2003 VICTOR COMPANY OF JAPAN, LIMITEDNo.MB0112003/10COMPACT COMPONENT SYSTEMMB01120039MX-GA9VTABLE OF CONTENTS1 PRECAUTION. . . . . . . . . . . . . . . . . . . . . . . . . . . . . . . . . . . . . . . . . . . . . . . . . . . . . . . . . . . . . . . . . . . . . . . . . 1-32 SPECIFIC SERVICE IN .
Tannoy Arena HighLine 300 Brochure & specs
Tannoy United Kingdom T: +44 (0) 1236 420199 F: +44 (0) 1236 428230 E: [email protected] North America T: (519) 745 1158 F: (519) 745 2364 E: [email protected] Deutschland T: 0180 1111 88 1 F: 0180 1111 88 2 E: [email protected] 0981 .
Arena HighLine 300, 8
Aiwa SC-A48 Service manual
ACTIVE SPEAKERSC-A48S/M Code No. 09-994-328-6R1AU(B)SERVICE MANUALREVISIONThis Service Manual is the “Revision Publishing” and replaces “Simple Manual”SC-A48 AU (S/M Code No.09-994-328-6T1).DATA .
Источник
Pioneer PDP-S13-LR User Manual
![]()
Sistema di diffusori
Sistema de altavoces
Istruzioni per l’uso
Manual de instrucciones

Thank you for buying this Pioneer product.
Please read through these operating instructions before using your speaker system so you will know how to make the most of its performance. After you have finished reading the instructions, put them away in a safe place for future reference.
This product is designed exclusively for use with the PDP-4340HD,PDP-434HDE,PDP-434HDG Pioneer plasma display. For more information on compatibility, please consult with your nearest Pioneer authorized dealer or service center.
÷ The nominal impedance of this speaker system is 8 ohms.
÷ In order to prevent damage to the speaker system resulting from input overload, please observe the following precautions:
÷ Do not supply power to the speaker system in excess of the maximum permissable input. This can result in damage or a possible fire hazard.
÷ When connecting or disconnecting pin-plugs, be sure that amplifier power is OFF.
÷ When using a graphic equalizer to emphasize loud sounds of a high frequency range, do not use excessive amplifier volume.
÷ Do not force a low-powered amplifier to produce a loud volume of sound (the amplifier’s harmonic distortion will be increased, and you may damage the speaker).
÷ An automatic restore-type protective device is incorporated to protect the speakers from excessive input signals or abnormal signals. When an excessive input signal is sent to the speakers, the protective device is activated and loud high-pitched sounds will be prevented. In this case, lower the volume of the plasma display during use. After 5 to 10 seconds, the speakers are restored automatically.
÷ Placing a CRT computer screen or CRT monitor near to the speakers may result in interference or color distortion. If this happens, distance the monitor from the speakers.
Notes on Installation Work:
This product is marketed assuming that it is installed by qualified personnel with enough skill and competence. Always have an installation specialist or your dealer install and set up the product.
PIONEER cannot assume liabilities for damage caused by mistake in installation or mounting, misuse, modification or a natural disaster.
CHECKING THE ACCESSORIES
7 Speaker cable x 2
7 Speaker mounting fittings (Used when installing the speakers on the right and left sides of the display)
Holder for installing the speakers on the right and left x 4
7 Speaker mounting fittings (Used when installing the speakers at the bottom of the display)
Bracket for installing the speakers at the bottom x 2 for right and left sides
Bracket for installing the speakers at the bottom x 1 for center
Rivet for installing the speakers at the bottom x 2
7 Speakers mounting screws
7 Operating Instructions
÷ Always use the accessory mounting fittings for installation.
÷ When screws other than those enclosed as accessories are used to install the speakers, the speakers may drop off or accidents may be caused. Always use the screws enclosed as accessories.
The customer can select whether to install the speakers on the right and left sides of the display or at the bottom of the display.
When the speakers are installed
When the speakers are
on the right and left sides
installed at the bottom
See the description below for details of the installation.
 CAUTION:
÷ Attach the plasma display to the stand (PDK-TS04) before installing the speakers. See the Operating Instructions packed together with the stand for how to assemble the stand.

INSTALLATION ON THE PLASMA DISPLAY
(WHEN INSTALLING THE SPEAKERS ON THE RIGHT AND LEFT SIDES OF THE DISPLAY)
Perform installation according to the following steps 1to 2.
1 Attach the mounting fittings to the speakers.
The illustration below shows the right speaker.
1 Align the convex portion of the holder for installing the speakers on the right and left sides with the concave
portion of the speakers.
Fix the two points with screws.
Attach holders to the top and bottom of one speaker.
4 Similarly, attach two holders to the top and bottom of the other speaker.
2 Attach the speakers to the display.
The illustration below shows how to attach of the right speaker.
1 Fix the upper screw temporarily in advance to hang the speaker on
the display (In this case, leave a
space of about 5 mm between the
head of the screw and the display).
2 Hang the speaker on the upper
screw. 3 Fix the lower screw temporarily.
4 Adjust the position so that the speaker is parallel to the display and then fix the upper and lower screws firmly.
3 
5 Attach the left speaker following the same procedure as described above.
INSTALLATION ON THE PLASMA DISPLAY
(WHEN INSTALLING THE SPEAKERS AT THE BOTTOM OF THE DISPLAY)
Perform installation according to the following steps 1to 2.
1 Attach the mounting fittings to the display.
1 Push rivets into each outside hole A of brackets (on the
right and left sides) for installing the speakers at the bottom.
2 Fix each outside hole Bof brackets (on the right and left sides), for installing the speakers at the bottom, with screws.
3 Insert the screws into the two outside holes of bracket (at the center), for installing the speakers at the bottom, and tighten them.
4 Align the bosses of the spacer with the holes of the stand and insert them.

2 Attach the speakers to the display.
Take care to ensure that the display does not hit the speakers in steps 1and 2when speakers are installed on the display.
1 Place it below the display while inclining one speaker and insert it into the bracket on the right side.
the speaker system. Do not hold the speakers and raise the display. This may cause the deformation or damage of products.
2 Similarly, insert the other speaker into the bracket on the left side.
3 Adjust so that the clearance between the speakers is lost and so that the speakers are not shifted to the right or left.
4 Fix the two points in the center of the display with screws.
5 Fix the two points (four points in all) on the right and left sides with screws. Adjust so that the speaker system is parallel to the display and then fix the speaker system.
÷ When the display is to be moved after speaker installation, do not hold the display by the speakers. Hold the handle of the display and the side or bottom of the display with reference to the figures below when moving
When the speakers are installed
When the speakers are
on the right and left sides
installed at the bottom
CONNECTION TO A PLASMA DISPLAY
1 Connecting the speaker cables
1 Switch off the power of the plasma display.
2 Connect the input terminals of the speaker system and the speaker output terminals of the plasma display with the accessory speaker cable. Make sure the positive (ª) and negative (·) terminals match when connecting.
1. Push the lever, insert the cable into the hole, and release the lever.
· terminal (black) ªterminal (red)
Input terminal of speaker
 Red
Red
To the· terminal
To the ª terminal
(Speaker input terminals of the speaker system)
2. For the output terminals on the plasma display, push the lever, insert the cable into the hole, and release the lever.
Output terminal of plasma
÷ After connection to the terminals, pull lightly on the cable to confirm that the tips of the cable are properly connected to the terminals. An imperfect connection can cause sound interruptions and noise.
÷ When cable cores stick out and ª and · lines are shortcircuited, an excessive load will be applied to the plasma display and the operation will stop or trouble will be caused.
÷ When the polarity is reversed for one speaker (left or right) at the time of connection to the plasma display, the bass reproduction will be reduced, the sound positioning will be lost, and a correct stereo effect will not be obtained.

2 How to route cables
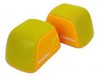
Speed clamps are included with the plasma display for tidying your cables and keeping extra cable length out of the way.
When installing the speakers on the right and left sides of the display
When installing the speakers at the bottom of the display
• Organize cables together using the speed clamps provided with the plasma display.
Insert 1 into an appropriate hole on the rear of the unit, then snap 2 into the back of 1 to fix the clamp.
A speaker cable or system cable is put in
the rack using a supplied wiring clamp so
that it cannot be viewed from the front.
To attach the speed clamps to the main unit
Connect the speed clamps using the 1 hole marked with • below, depending on the situation.
Speed clamps are designed to be difficult to undo once in place. Please attach carefully.
To remove speed clamps
Using pliers, twist the clamp 90° and pull it outward.
In some cases the clamp may have deteriorated over time and may be damaged when removed.
÷ Use a polishing cloth or dry cloth to wipe off dust and dirt.
÷ When the cabinet is very dirty, wipe with a soft cloth moistened with water-diluted cleanser; then wipe again with a dry cloth. Do not use furniture wax or cleaners. They may damage the surface of the cabinet.
÷ Never use thinner, benzine, insecticide sprays and other chemicals on or near the cabinets, since these will corrode the surfaces.
÷ When a chemical cloth is used, read the cautions for the chemical cloth carefully.
Cabinet : Bass-reflex type
Used speakers (two-way system) :
Woofer (for low tones)
Tweeter (for high tones) .
2.5 cm dome type
82 dB/W (at 1 m distance)
107.5 (W) x 559 (H) x 65 (D) mm
Accessory parts (for 2 speakers)
. Speaker cable x 2
. Bracket for installing the speakers at the bottom (for right and left side) x 2
. Bracket for installing the speakers at the bottom (for center) x 1
. Screw (M5 x 10) x 12
. Holder for installing the speakers on the right and left x 4
. Operating Instructions x 1
Specifications and design subject to possible modification without notice, due to improvements.
Published by Pioneer Corporation.
Copyright © 2003 Pioneer Corporation.
All rights reserved.
Handling the power cord on this product or cords associated with accessories sold with the product will expoes you to lesd, a chemical known to the State of California and other governmental entities to cause cancer and birth defects or other reproductive harm.
Wash hands after handling.

Merci pour votre achat de cet appareil Pioneer.
Veuillez lire attentivement toutes ces instructions de fonctionnement avant d’utiliser votre enceinte acoustique de façon à pouvoir en tirer le meilleur profit. Après lecture complète du livret d’instructions de fonctionnement, le ranger dans un endroit sûr afin de pouvoir vous y reporter facilement en cas de besoin lors de l’utilisation de l’enceinte acoustique.
Ce produit est conçu exclusivement pour l’utilisation avec un écran d’affichage au plasma Pioneer PDP- 4340HD,PDP-434HDE,PDP-434HDG. Pour plus d’informations sur la compatibilité, merci de vous renseigner auprès de votre concessionnaire ou centre de services Pioneer le plus proche.
÷ L’impédance nominale de cette enceinte acoustique est de 8 Ω.
÷ Afin d’éviter d’endommager l’enceinte acoustique, suite à une surcharge à l’entrée, veuillez observer les précautions suivantes:
÷ Ne pas fournir aux haut-parleurs une alimentation supérieure à la valeur maximale admise, sinon l’appareil risque d’être endommagé ou un incendie pourrait éclater.
÷ En connectant ou en déconnectant les fiches à plots, s’assurer que l’alimentation de l’amplificateur est coupée sans faute.
÷ En utilisant un égalisateur graphique pour accentuer les sons forts dans la plage des hautes fréquences, ne pas régler l’amplificateur à un volume excessif.
÷ Ne pas contraindre un amplificateur de faible puissance à fonctionner à un volume sonore poussé (la distorsion harmonique de l’amplificateur sera accrue, ce qui risquerait d’endommager le haut-parleur).
÷ Un dispositif automatique de protection de type à rétablissement est incorporé pour protéger les hautparleurs contre tout signal d’entrée excessif ou anormal. Quand un signal d’entrée excessif est envoyé aux hautparleurs, ce dispositif de protection se met en marche, ce qui permet d’éviter la génération de sons forts et aigûs. Dans ce cas, baissez le volume de l’écran plasma pendant l’utilisation. 5 à 10 secondes plus tard, les haut-parleurs reviendront automatiquement à leur état initial.
÷ Si un écran d’ordinateur à écran cathodique (CRT) ou un moniteur à écran cathodique (CRT) est placé à proximité des haut-parleurs, il risque de présenter des interférences ou une dénaturation des couleurs. Dans ce cas, éloigner le moniteur des haut-parleurs.
Remarques sur l’installation:
Ce produit est vendu en assumant qu’il sera installé par un personnel suffisamment expérimenté et qualifié. Faites toujours réaliser le montage et l’installation par un spécialiste ou par votre revendeur.
PIONEER ne peut être tenu responsable pour tout dommage causé par une erreur d’installation ou de montage, une mauvaise utilisation ou un désastre naturel.
V’ERIFICATION DES ACCESSOIRES
7 Câbles de haut-parleur x 2
7 Accessoires de montage pour haut-parleurs (pour installation des haut-parleurs sur les côtés droit et gauche de l’écran)
Fixation pour installation des haut-parleurs à droite et à gauche x 4
7 Accessoires de montage pour haut-parleurs (pour installation des haut-parleurs au bas de l’écran)
au bas de l’écran x 2 pour les côtés droit
Support pour installation des haut-parleurs
Support pour installation des hautparleurs au bas de l’écran x 1 pour le centre
Rivet pour installation des hautparleurs au bas de l’écran x 2
7 Vis pour montage des haut-parleurs
÷ Utilisez toujours les accessoires de montage pour l’installation.
÷ Si des vis autres que ceux ci-joints sont utilisés pour installer les haut-parleurs, ceux-ci peuvent se détacher et tomber, ou des accidents risquent de se produire. Utilisez toujours les vis ci-joints comme accessoires.
Le client peut choisir d’installer les haut-parleurs soit à droite et à gauche de l’écran, soit au bas de l’écran.
Cas où les haut-parleurs sont
Cas où les haut-parleurs
installés sur les côtés droit et
sont installés au bas de
Se référer à la description ci-dessous pour les détails de l’installation.
 ATTENTION:
÷ Avant de procéder à l’installation des haut-parleurs, fixez l’écran plasma sur son socle (PDK-TS04). Se référer au mode d’emploi fourni avec le socle pour la procédure d’assemblage.

INSTALLATION SUR L’ECRAN PLASMA
(POUR INSTALLATION DES HAUT-PARLEURS À DROITE ET À GAUCHE DE L’ÉCRAN)
Effectuez l’installation selon les étapes 1 à 2 suivantes.
1 Fixez les accessoires de montage sur les haut-parleurs.
L’illustration ci-dessous désigne le haut-parleur de droite.
1 Alignez la partie convexe de la fixation pour l’installation des haut-parleurs sur les côtés droit et gauche avec la
partie concave des haut-parleurs.
Fixez ces deux points à l’aide de vis.
Fixez les fixations en haut et en bas de l’un des haut-parleurs.
4 De façon identique, fixez les deux fixations en haut et en bas de l’autre haut-parleur.
2 Fixez les haut-parleurs à l’écran.
L’illustration ci-dessous montre la fixation du haut-parleur de droite.
1 A l’avance, fixez la vis du haut en la serrant à mi-chemin afin d’accrocher le haut-parleur sur l’écran (dans ce
cas, laissez un espace de 5 mm
environ entre la tête delavis et l’écran).
Accrochez le haut-parleur sur la
Fixez la vis du bas en la serrant à
4 Réglez la position de façon à ce que le haut-parleur soit parallèle à l’écran puis serrez fermement les vis du haut et du bas.
2 
3 
5 Fixez le haut-parleur de gauche selon une procédure identique à celle décrite
INSTALLATION SUR L’ECRAN PLASMA
(POUR INSTALLATION DES HAUT-PARLEURS AU BAS DE L’ÉCRAN)
Effectuez l’installation selon les étapes 1 à 2 suivantes.
1 Fixez les accessoires de montage sur l’écran.
1 Poussez les rivets dans chaque orifice extérieur A des
supports (côtés droit et gauche) pour installer les hautparleurs au bas de l’écran.
2 Fixez chacun des orifices extérieurs B des supports (côtés droit et gauche) pour installer les haut-parleurs au bas de l’écran, à l’aide de vis.
3 Insérez les vis dans les deux trous extérieurs du support (au centre), pour l’installation des haut-parleurs au bas de l’écran, puis resserrez-les.
4 Alignez les parties saillantes de l’entretoise avec les orifices du socle et emboitez-les.

2 Fixez les haut-parleurs à l’écran.
Prenez garde que l’écran ne cogne pas contre les hautparleurs aux étapes 1 et 2 de leur installation sur l’écran.
1 Placez l’un des haut-parleurs sous l’écran tout en l’inclinant, puis insérez-le dans le support sur le côté droit.
2 De façon similaire, insérez l’autre haut-parleur dans le support sur le côté gauche.
3 Ajuster la position pour éliminer l’espace entre les hautparleurs, et pour que les haut-parleurs ne puissent bouger ni vers la droite ni vers la gauche.
4 Fixez les deux points dans le centre de l’écran à l’aide de vis.
5 Fixez les deux points (quatre points au total) sur les côtés droit et gauche, avec les vis. Réglez la position de façon à ce que les haut-parleurs soient parallèles à l’écran, puis fixez-les.
÷ Si l’écran doit être déplacé aprè l’installation des hautparleurs, évitez de le tenir par les haut-parleurs. Pour déplacer le système de haut-parleurs, soulever l’écran en le tenant par les poignées et par les côtés ou le bas, comme indiqué par les figures ci-dessous. Ne pas soulever l’écran en tenant les haut-parleurs. Il pourrait
s’ensuivre une déformation ou un endommagement des produits.
Pour installation des haut-parleurs
Pour installation des haut-
à droite et à gauche de l’écran
parleurs au bas de l’écran
BRANCHEMENT A L’ECRAN D’AFFICHAGE AU PLASMA
1 Branchez les câbles de haut-parleur.
1 Coupez l’alimentation de l’écran plasma.
2 Rejoignez les bornes d’entrée du système de hautparleurs et les bornes de sortie de l’écran plasma avec un câble de haut-parleur accessoire. Assurez vous qu’en étant connectées, les bornes positives ª et négatives · s’assortissent.
1. Appuyez sur le levier, insérez le câble dans le trou, puis relâchez le levier.
Borne d’entrée du haut-
Noir 
Vers la borne ª
(Bornes d’entrée des haut-parleurs)
2. Pour les bornes d’entrée de l’écran plasma, appuyez sur le levier, insérez le câble dans le trou, puis relâcher le levier.
Bornes d’entrée de
÷ Après l’avoir connecté aux bornes, tirez légèrement le câble vers vous, afin vous assurer que les extrémités sont correctement branchées aux bornes. Un branchement incorrect peut être á l’origine de coupures de son ou de bruits.
÷ Si des brins du noyau de câble dépassent et les lignes ª et · sont court-circuitées, l’écran plasma sera exposé á une charge excessive et l’opération s’arrêtera ou sera dérangée.
÷ Si la polarité est inversée chez un haut-parleur (celui de gauche ou de droite), au moment de la connection á l’écran plasma, la reproduction des basses sera altérée, l’orientation sonore sera disparaîtra et un effet stéréo correct ne sera pas obtenu.

2 Comment fixer le parcours des câbles
Des serre-câbles sont fournis avec l’écran plasma pour mettre de l’ordre dans vos câbles et tenir la longueur de câble supplémentaire non-utilisé à l’écart.
Pour installation des haut-parleurs à droite et à gauche de l’écran
Câble de haut-parleur
Câble de haut-parleur
Pour installation des haut-parleurs au bas de l’écran
Les câbles de haut-parleurs ou les câbles
du système sont placés dans le cadre
derrière l’écran, à l’aide des colliers
fournis, pour qu’ils ne soient pas visibles
Câble de haut-parleur
Câble de haut-parleur
• Regroupez les câbles á l’aide des serrecâbles rapides fournis avec l’écran plasma.
Introduisez 1dans le perçage adéquat á l’arrière de l’appareil, puis fermez le serre-câble en insérant 2 á l’arrière de 1, le
Les serre-câbles sont conçus pour être difficiles á défaire, une fois fermés. Nous vous prions de les attacher prudemment.
Pour enlever les serre-câbles.
Á l’aide d’une paire de pinces, tordez le serre-câble á 90° et tirez le vers l’extérieur. Dans certains cas le serre-câble a pu se détériorer avec le temps et peut s’endommager lors de sa suppression. 
Fixez les serre-câbles rapides á l’appareil principal.
Connectez les serre-câbles en les insérant dans le trou désigné par •, comme indiqué ci-dessous, selon la situation.
![]()
ENTRETIEN DU COFFRET
÷ Utiliser un chiffon à polir ou un chiffon sec pour essuyer la poussière et éliminer les salissures.
÷ Si le coffret est très sale, le frotter avec un chiffon doux imbibé de liquide à nettoyer dilué d’eau. Ensuite, essuyer à nouveau avec un chiffon sec. Ne pas utiliser de cire à meuble ou de produits de nettoyage corrosifs. Ils risqueraient d’endommager la surface du coffret.
÷ Ne jamais utiliser non plus de diluant, de benzine, d’insecticides à pulvérisateur et autres produits chimiques sur le coffret ou à proximité, car ils risquent de corroder les surfaces.
÷ Si l’on utilise un chiffon chimique, lire et observer attentivement les précautions à prendre pour son usage adéquate.
Coffret : Type bass-reflex
Haut-parleurs utilisés (système à double sens) :
Haut-parleur de graves
Type à cône ovale
Type à dôme de 2,5 cm
Plage de fréquences .
82 dB/W (à 1 m de distance)
Fréquence de recouvrement .
107,5 (L) x 559 (H) x 65 (P) mmâ
Pièces accessoires (pour 2 haut-parleurs)
. Câbles de haut-parleur x 2
. Support pour installation des haut-parleurs au bas de l’écran (pour les côtés droit et gauche) x 2
. Support pour installation des haut-parleurs au bas de l’écran (pour le centre) x 1
. Vis (M5 x 10) x 12
. Fixation pour installation des haut-parleurs à droite et à gauche x 4
. Mode d’emploi x 1
Les spécifications et la finition sont susceptibles d’être modifiées sans préavis en vue de l’amélioration.
Publication de Pioneer Corporation. © 2003 Pioneer Corporation.
Tous droits de reproduction et de traduction réservés.

Wir danken Ihnen dafür, daß Sie sich für ein Produkt von Pioneer entschieden haben.
Bitte lesen Sie vor der Verwendung Ihrer Lautsprecheranlage diese Anleitung aufmerksam durch, um die Vorzüge des Systems optimal ausnützen zu können. Nachdem Sie die Bedienungsanleitung durchgelesen haben, bewahren Sie sie sorgfältig auf, um sich im Bedarfsfall jederzeit darauf beziehen zu können.
Dieses Produkt ist ausschließlich auf den Einsatz mit dem Pioneer Plasmabildschirm PDP-4340HD,PDP- 434HDE,PDP-434HDG ausgelegt. Bitte beraten Sie sich hinsichtlich weiterer Informationen uber Kompatibilitat mit der nachsten Pioneer Vertretung oder dem nachsten Kundendienst.
VOR DER VERWENDUNG
÷ Die Nennimpedanz dieses Lautsprechersystems beträgt 8 Ohm.
÷ Um eine Beschädigung des Lautsprechersystems durch ein zu starkes Eingangssignal zu vermeiden, müssen die folgenden Hinweise unbedingt beachtet werden:
÷ Keinesfalls die max. zulässige Belastbarkeit (Eingangspegel) der Lautsprecher überschreiten. Anderenfalls können Schäden oder Brandgefahr resultieren.
÷ Vor dem Anschließen und Abziehen von Stiftsteckern muß die Stromversorgung zum Verstärker unbedingt auf OFF gestellt werden.
÷ Wenn ein Graphik-Equalizer verwendet wird, um die Töne im Hochfrequenzbereich zu verstärken, darf die Lautstärke des Verstärkers nicht zu hoch eingestellt werden.
÷ Versuchen Sie nicht, hohe Lautstärken über einen Lautsprecher mit nicht ausreichender Kapazität wiederzugeben (dies führt zu einer Verstärkung des Klirrfaktors; außerdem kann eine Beschädigung der Lautsprecher die Folge sein).
÷ Eine automatische Rüchstelltyp Schutzvorrichtung ist eingebaut, um die Lautsprecher vor zu starken Eingangssignalen oder abnormen Signalen zu schützen. Wenn ein zu starkes Eingangssignal an die Lautsprecher angelegt wird, schaltet sich diese Schutzvorrichtung ein, so dass die Erzeugung lauter, hoher Geräusche verhindert wird. In diesem Fall die Lautstärkeeinstellung am Verstärker beim Gebrauch reduzieren. Nach 5 bis 10 Sekunden werden die Lautsprecher automatisch wieder auf ihre Ausgangseinstellung zurückgestellt.
÷ Bei unzureichender Entfernung von CRT ComputerMonitoren oder CRT Monitoren können die Lautsprecher Bildrauschen oder Farbstörungen verursachen. In diesem Fall die Entfernung zwischen Lautsprecher und Bildschirm vergrößern.
Hinweise zur Installation
Dieses Produkt wird unter der stillschweigenden Voraussetzung vertrieben, dass es von ausreichend qualifiziertem Personal installiert wird. Lassen Sie es daher vom Fachmann bzw. Ihrem Händler aufstellen bzw. montieren und einrichten.
PIONEER legt jegliche Haftung für Schäden ab, die durch Fehler bei der Installation bzw. Montage oder durch Bedienfehler, Veränderungen oder höhere Gewalt entstehen.
ÜBERPRÜFEM DER ZUBEHÖRTEILE
7 Lautsprecherkabel x 2
7 Lautsprecheraufhängungen (dienen zur Installation der Lautsprecher links und rechts des Bildschirms)
Halterungen zur Installation der Lautsprecher links und rechts x 4
7 Lautsprecheraufhängungen (dienen zur Installation der Lautsprecher am unteren Rand des Bildschirms)
Halterung zur Installation der Lautsprecher 
 am unteren Rand x 2 für links und rechts
Halterung zur Installation der Lautsprecher am unteren Rand x 1 für die Mitte
Nieten zur Installation der
Lautsprecher am unteren Rand x 2
7 Befestigungsschrauben für die Lautsprecher
÷ Zur Installation der Lautsprecher stets die als Zubehör mitgelieferten Befestigungsteile verwenden.
÷ Wenn andere als die mitgelieferten Schrauben zur Montage der Lautsprecher verwendet werden, können die Lautsprecher herunterfallen oder es können Unfälle passieren. Daher stets nur die als Einbausatz mitgelieferten Schrauben verwenden.
Der Kunde kann wählen, ob die Lautsprecher links und rechts oder am unteren Rand des Bildschirms installiert werden.
Источник